megMORGAN
  • home
  • press
  • runway
  • contact
  • Let's talk food and fashion
  • Shop
  • home
  • press
  • runway
  • contact
  • Let's talk food and fashion
  • Shop

Let's talk food and fashion

For the love of fashion, wine, crafting and all things cheese
Welcome to my blog

Cheap and easy – the way I like creating new collections

8/31/2016

0 Comments

 
Picture
Picture
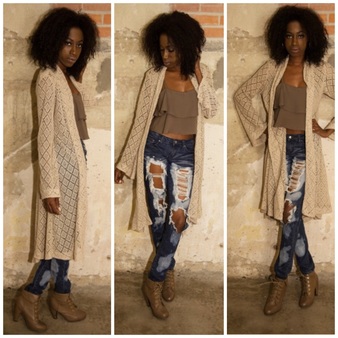
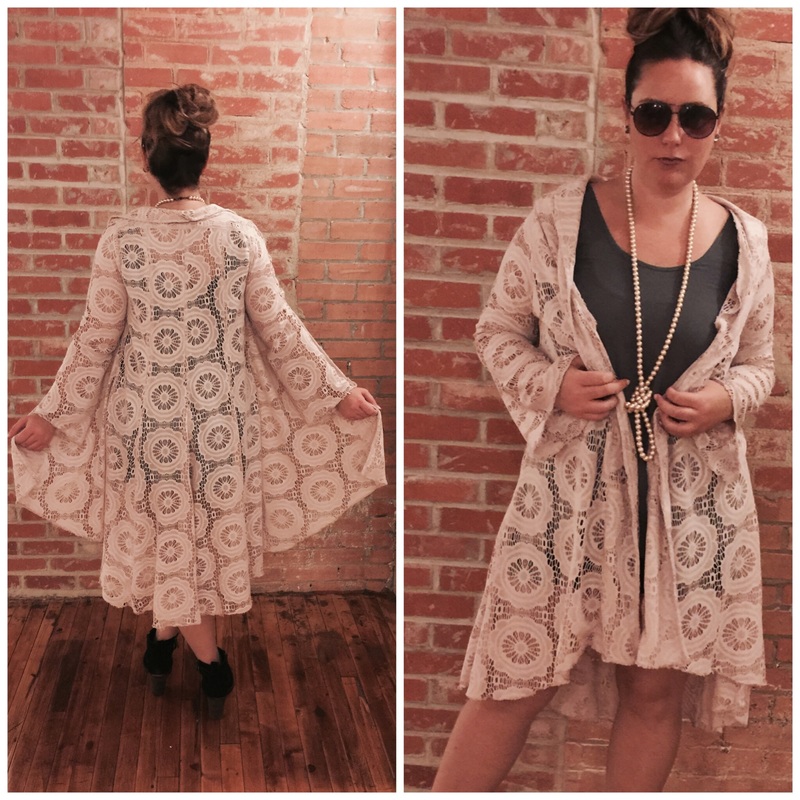
There is something about the fabric creating the mood for a collection that has always fascinated me. Coco Chanel changed the fabric in her famous tweed jacket over 75 times, proving that all it takes to completely transform the look and feel of the same basic pattern is a fresh print or a slight alteration. As a small designer, this strategy can greatly help with the cost of overhead! I’m not sure if this is a topic designers typically talk about… but let’s get real.  Not everything is based on creative magic. Sometimes it comes down to being cost-effective and using what you have in your studio; refreshing patterns with a slight tweak or reusing the same pattern in a new fabric can create a completely different look. Maybe that’s its own kind of studio magic… a poor designer’s guide to fashion design!
 
Let’s start with my first love (and a small confession)...I am a fabric junkie. Seriously, I hoard it.  I just can’t help myself – fabric feeds my heart!  When I see a fun and flirty floral or a vibrant bold print, I just have to have it! Never mind the fact that I have no immediate use for it, or that I have three similar prints sitting at the studio in a crate. They are not like THIS one. This is “the one” and I neeeeed it!! Yes I know I sound like a crazy person when I get going about fabric… You just never know when THAT floral print will be perfect for a creation!
 
When starting a collection I always begin with the fabric before doing any sketching. This is because the fabric has a way of telling me what it wants to be (there I go again). When you’re refreshing some looks from seasons past, changing the fabric is a very fast and effective way to make a whole “new” aesthetic! The fabric sets the tone and feel for a collection. For example, in one season you do a long cardigan in black lace, giving a gothic but romantic vibe. The next year you can use the same pattern to remake the cardigan using that floral silk print you had to have, and BAM a whole new look that is light and playful. It's easy to completely change the tone by swapping out the fabric!
 
Now if you're going for a completely new design, why not start with one of your favorite patterns? You already know it fits great and moves well, so why not add on to this strong base and create something "new". By manipulating patterns, you are not only able to cut some of the overhead, but also easily refresh your design. Add sleeves to a top, make a dress longer/shorter, change the waist line and BAM you have created a completely new garment! No one will even guess that you started with an amazing design you did three years ago and just began adding on. I call this working smarter, not harder.
 
Well there you have it, I have broken the rules again with this post, and let you in on an insider secret. Never be ashamed of refreshing patterns or remaking the same design with a new fabric (everyone does it!). Heck, that’s just smart business! Build up a great set of pattern blocks and tweak away, because this design technique will save you time and money! And hey… if it was good enough for Coco its good enough for me!
 
​
0 Comments

Sunday Funday Guac

6/20/2016

1 Comment


 ​Nothing says its summer to me like being by the pool with a big bowl of this Texas-sized guacamole! Seriously, after you run out of chips you will be eating from the bowl with a fork… it’s that good (poolside pics from the waist up only this summer please). Surprisingly simple, this recipe will have your guests asking for it every Sunday Funday! It’s easy to double, triple, or quadruple if you need to feed a larger crowd.
Ingredients
·       
  2 handfuls of fresh cilantro, chopped
·         1 red bell pepper seeded/chopped
·         ½ a white onion chopped
·         1 yellow bell pepper seeded/chopped
·         1 jalapeno, seeded and finely chopped (no shame in Wearing gloves for this part!)
·         2 cloves garlic, finely chopped
·         2 lemons, zested and juiced
·         4 ripe avocados
·         Salt to taste
·         Garlic salt to taste
·         Dash of Cumin

Let’s get this party started by slicing our avocadoes in half and removing the pits. Now scour them by slicing a tick-tac-toe pattern in, but not through the rind (this makes it easier to mash later) and scoop out the meat into a mixing bowl, or just flip them over and turn them on out.

Now let’s get chopping! Chop everything to your preference, I prefer to leave the bell peppers bigger while the garlic, onion and the jalapeno I make sure to chop extra fine.  Chop ½ a white onion, 1 jalapeno, 2 cloves of garlic, 2 handfuls (or more if you love it) of cilantro then 1 red and 1 yellow bell pepper.  Add all your chopped goodness into the mixing bowl with the avocadoes. If all those colors together does not scream summer party I don’t know what does!

Now it’s time to get your zest on… with 2 lemons (we are scandalous this summer!). After zesting, chop them in half and squeeze the juice into the mixing bowl.  Look out for stray seeds, ain’t nobody got time for that!

Try not to take out your anger on the avocadoes on this next part! We are going for a good chunky dip not a completely smooth one. I find it best to use a fork for the best consistency (insert cheesy sarcastic voice) high-tech kitchen tools are the absolute best! Mix all ingredients together and mash the avocado on the sides and bottom of the mixing bowl until the desired consistency.

Next is my favorite part – yes, adding in the salt. I find it best to open a bag of chips at this point (and a beer) and add a little salt and garlic salt, mix, dip, and repeat as needed… but for those people that like measurements and exactness in their lives (you know who you are) I end up adding around 1 tsp of garlic salt and ½ tbs of salt. If you’re in the mood for a little more kick, sprinkle in a little dash of cumin as well.
 
For the finishing touches, let’s make it pretty before your guests arrive. Move the guac into your serving bowl. To make it extra fancy, try serving it with pita chips, cheese quesadilla wedges, or even fresh thick sliced bell peppers for a colorful less carby option.
​
Cheers and happy Sunday Funday!!!

1 Comment

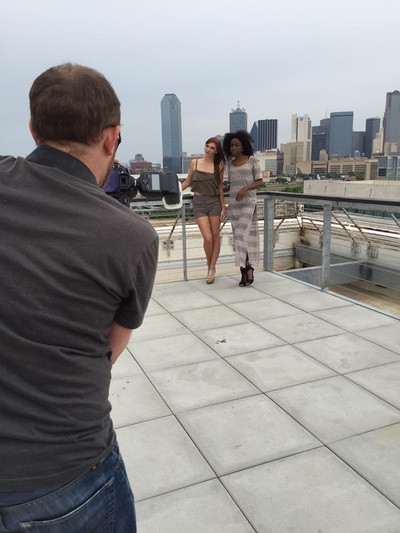
Words of wisdom from both sides of the camera: Behind the scenes of a megMORGAN photoshoot… featuring an interview with fashion model Erin Michelle

4/30/2016

0 Comments


I have been trapped inside all winter and we know what that means – yes, I drank a bunch of wine and designed my 2016 collection…don’t judge my process. So with that comes a spring photoshoot! I like to think that over the years I have learned a few things about successful photoshoots, so this is my list of what to do and what NOT to do as a designer. I also bring in my girl Erin Michelle for a one-on-one interview for the true side of modeling. So get ready for a whole lot of truth in this post!
 
“We learn from failure, not from success!”(Bram Stoker) and trust me I have made ALL of these mistakes in my career as a designer, and I’m sure I’ll make a few more along the way (so look for a sequel of this post). But for now this is all I have for you, so save yourself a hard lesson or two and keep reading!

    · Your friend’s success will not look like your success! There is no magic formula to be a designer; what works for you and your brand will not work for others. Fashion is an art, and all art is different. My best advice is to know your market and know who you are trying to sell to and build on that.
    · Your friends are beautiful, but they are not models! It’s not as easy as it looks! Think of it this way – how many pics does it take for you to take a good selfie? (I’m just going to leave that there but you get the point!)
    · Do not take 1000 pictures of the same dress! If you have a good photographer and models who know what they are doing just cover the basics. Oh and make sure to get vertical and horizontal shots. You never know when you are going to need them, but when you do you REALLY DO!
    · Please stop ticking people off and give credit on social media for everything! If you are a small designer, chances are you are working with artists who are also hustling to grow their business just as much as you are, so support them!
    · Feed your crew! The saying that models do not eat is SOOO false! I have seen a model eat half a pizza in one sitting (some girls have all the luck!). Backstage at the shoot you are either running full steam, or sitting around just waiting – so pack an ice chest with water and a few snacks for the downtime.
    · If you are just starting out and have friends that are also in the trade, ask them if they would like to do the photoshoot with you! When I had just started out, I had two designer girlfriends who always did shoots with me. We made sure to change hair of the models between designers, and we made sure that the backdrop was slightly different. By sharing some of the cost, you are able to get a better picture in the end – trust me, it’s worth it!!

This post got me wondering what it’s like to be on the other side of the camera. As a designer, you are the one with the reigns – it’s your party, but what is it like to have to show up as a blank canvas with a shoe bag, a smile on your face, and be made up into another person’s vision? To help explain this I brought in a local Dallas runway model who has walked in shows such as The Pin Show, Designers Choice Fashion Preview and Dallas Fashion Week. She started walking for me when she was 14, and has grown into a well-known name in the Dallas fashion world. So with out further ado, here is my interview with the always fabulous Erin Michelle.
​
How did you get started in modeling?  
I actually started as a photographer’s model by signing up to do some TF (trade for) shoots.  I was lucky enough to have great fashion images taken by some amazing photographers, who also happened to be in the “business,” and they suggested that I do some runway shows so I started attending some castings and getting picked to walk for shows as well! 
 
Any advice for someone who is just beginning
?  I was told at the very beginning to remember that I was a clothes hanger for designers, and that it was my job to make the clothes look great, and to understand it is not about me at all.  And that perspective helped when I wasn’t picked, or told I was too short, too big, too tan, or “too” anything.  It isn’t personal; a designer should choose what will make their brand stand out.  It also makes you very proud when you are picked, so a model should do everything possible to help that designer be successful. I would also tell a person to also be on time, have a great shoe bag, never complain about hair/makeup choices or clothing, and be willing to go with last second changes.  Thanks to Willie Johnson, I think I have a great runway walk!
 
What is your most humorous experience on the job? 
In a runway show, you have the catwalk pace, but then there is a mad dash to get changed and back on stage in no time flat.  At Fashion Cited one year, the pace was so crazy that I had two personal dressers along with my mom who was a “fetch” person, and designers.  I was steps from walking out when a designer came running out and wanted me to change shoes to an ethnic style he had brought.  I put my foot out like Cinderella, he bent down and put them on me, and I walked out.  Afterwards, when I took them off, I saw they were a size 6.  I wear a size 9.  I still don’t know how I was able to even walk!
 
 Any advice for designers from a model’s point of view? …be nice to us ;) 
I’ve actually had awesome experiences with designers, but have learned they can be somewhat eccentric at times (LOL).  I have also learned that in many cases, whatever is selected for me to wear at a fitting is NOT what I will end up wearing on the runway, as so many last minute changes happen!  At Designer’s Choice one year, my parents totally missed me on one of my walks because of a very last minute change on what I would be wearing that totally changed my appearance.  The only thing I would advise is for designers to make sure to give models clear expectations of what they want.  If you want us to bring Cowboy boots with us, for example, let us know because they aren’t a standard part of my model shoe bag (even though I have about three pairs at home).
 
What’s your favorite snack that has been served on set or backstage? 
I love it when designers or show producers realize that models aren’t going to all of a sudden get too big for their clothes if they serve them pizza or non-healthy foods and give us a selection!  Have you watched models eat?  We are hungry, and we do a lot of waiting around for hair/makeup and fittings sometimes. It’s not the celery and carrots we go for; it’s the good stuff!  I prefer finger food and definitely choices that aren’t greasy, and I love fresh fruit.   My favorite was when every model got a personal Bundt cake mini to eat.  YUM! 
 
So there you have it friends, wisdom from both sides of the camera. Whether you’re a model or a designer, I think the best overall advice is to just have fun and be nice to everyone. Oh and don’t forget to feed the models!

0 Comments

Fabulously spring-y Banana Ice box cake

3/23/2016

0 Comments

 
Picture
With spring comes sunshine, fashion week, and spring potlucks! As a proper southern gal I always bring my A-game when making a dish for a potluck or a family event. If you grew up in the south you know there is always an unspoken competition for who can dish it up the best!

Pro tip #1 - Do NOT cut on the calories. Yes, I know bikini weather is around the corner, but this is an event dish… It’s a big deal!  The trick to being the best cook at the potluck and still making it into that bikini in a few weeks is to leave your yummy dish for OTHER people to eat and go home to stuff your pretty face with baked salmon and broccoli (insert evil laugh here).

 Pro tip #2 - Have cute serving dishes and totes that can transport your food. Nothing is worse than spending time in the kitchen to make a culinary masterpiece and showing up after a car ride with a big pile of goo…. Let’s not lie, you would still eat it, (probably with a spoon straight from the dish if you were by yourself at home) but this is not the picture you’re trying to recreate for your guests.

Pro tip #3 - “With April showers comes spring flowers.” The weather is something to keep in mind! I don’t care what people say, never make a cake on a rainy day! I attempted this once and while the cake looked fine in the oven, when I took the lil guy out it gave up… no I mean it died. Really it collapsed into itself and then magically turned into cake pops (funny how that worked out). So bakers beware! Only bake in good weather.
​

Pro tip#4 - Talk with family and friends and swap recipes! You’re only as good as your friends and family’s recipes! We all tweak things to fit our taste, but your family and friends are definitely the place to start if you’re looking for the best!
 
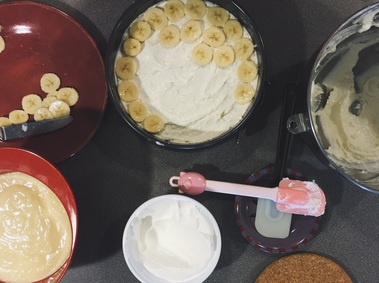
This is a recipe that was given to me by a family friend. It’s super easy to make and to transport, and my husband just ate half of it with a spoon... I might have eaten the other half ;)  Yeah… it’s that good!!!
 
Fabulously spring-y Banana Ice box cake
​

Whatcha need:
3 Bananas
1 cup flour
½ cup chopped pecans
½ cup margarine
1-10oz Carton whipped topping
1-8oz Pkg. Cream Cheese
2sm. Pkgs Cheese cake instant pudding
3 Cups Milk
1 Cup Powdered Sugar
3 Bananas
 
First make your crust:
Pre heat oven to 375 degrees
Mix flower, chopped pecans and margarine. Pat into a 9 x 13 pan. Bake for 20 min and let completely cool
Now it’s time to mix up your layers while the crust is cooling
Layer 1:
Mix on low speed 1 cup whipped topping, 1 cup powdered sugar, and cream cheese. Spread on cooled crust
Layer 2:
Sliced bananas
Layer 3:
Make the 2 packages of cheese cake instant pudding and place in fridge to set
Layer 4:
Rest of the whipped topping
Now when the crust is cooled and your pudding is set its time to start laying your cake! The hard part is to actually make a cake at this point and not just eat everything with a spoon!
Once you have your layers, place cake in refrigerator for four hours… and then ENJOY! This is a great cake to make the day before your event, it even freezes well. And if you want to be fancy like me add shaved chocolate on top and flower pedals – can you think of anything that looks more fabulously spring-y!
​

0 Comments

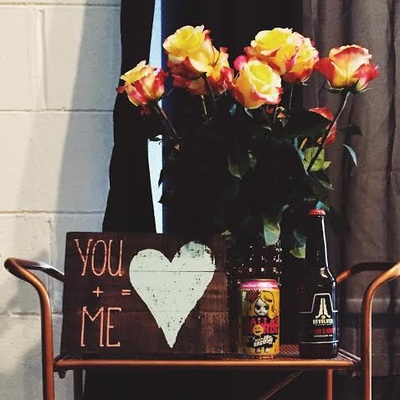
Beer... Because my husband "fixed me" – how to impress a guy with your crafty beer knowledge this Valentine's Day!

2/14/2016

0 Comments

 
Ok winos, don’t disown me!!  I'm not a traitor, I have just evolved my pallet to include the joy of craft beer...because my husband "fixed me” (his words not mine). I wanted to pass on this knowledge in time for you single ladies to impress your date tonight for Valentine’s Day. 
 
And if you’re looking for next year’s Valentine… Not only are craft beer events way more casual than wine tastings, but your chances of meeting a hot heterosexual guy (probably with a beard) just tripled! You need to get off Tinder and start drinking more beer! (Solid dating advice…)
 
I know the ABVs and IBUs and IPAs of craft beer may seem like a foreign language at first, but once you’ve got the lingo down, you’ll be able to hold your own in any beery setting. A few things to keep in mind:
 
Craft beer is typically a little stronger than your light beer and might hit you harder than your trusty old chardonnay… So if you want to keep your panties on, read the ABV (alcohol by volume) percentage, try to stick to around 5ish% at first and work your way up from there.
 
If you take a drink and then make a face like a sour patch kid, chances are your tasting hops and you probably ordered an IPA (India Pale Ale). Hops are an acquired taste; try eating something salty between sips to avoid making the face. It helps a lot!! To avoid the face all together read the IBU rating (International Bitterness Units), if it’s above 60 or so and it’s light in color then order salty carbs or pass all together. If the IBU is over 60 and it’s dark in color chances are your fine, bold flavors like chocolate or coffee were added to balance out the taste of ass.
 
Beer guys love to talk about beer! (I know, I married one.) So ask them questions, ask for suggestions, then ask them to come home with you…to soon? Ok, stick to asking questions about beer and if you’re not able to make up your mind ask for a flight so you can try a bunch of things to figure out what you like.
 
And finally, eat something for goodness sake (and not just a side salad) before drinking! You need carbs… gasp I know! But it helps soak up the booze, and you will feel better.
 
Below I have a few suggestions to get ya started based on your current drinking preferences.  
 
 
White Wines (chardon-nay nay):
Sweet: Austin East Ciderworks Texas Honey
Dry: Austin East Ciderworks Original Dry

Red Wine lovers try a Stout…they are strong and sweet (just like I like my man).
Sweet: Southern Tier Warlock
Dry: Revolver Mother's Little Fracker

Light Beer
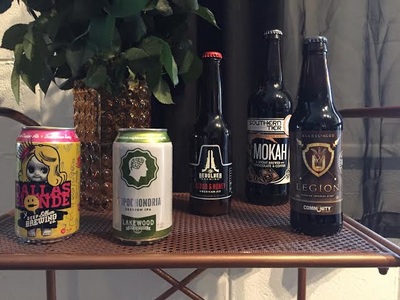
Chances are if you’re ordering a light beer, some bearded hottie has tried to order you something stronger. So that you’re not left at his mercy, try ordering a Deep Ellum Dallas Blonde or a Southern Star Bombshell Blonde. They are still pretty light but have a little more flavor, and will spark up a conversion too!

Blue Moon
If a brew comes with fruit, it’s less calories right? Well that’s my story and I’m sticking to it! If this is your beer of choice try a Revolver Blood and Honey, it’s a wheat beer that’s finished with Blood Orange zest and it's freaking AMAZING!

Martini Kind of girl
So you can handle the hard stuff and you’re not looking for something super sweet – try an Irish Red like the Peticolas Velvet Hammer. WARNING this is one that will make it a good night quickly at 9% ABV.

If this knowledge does not impress your V-day date tonight, screw him you don't need that kind of negativity in your life! He is obviously no fun BYE FELICIA!!! Now order another round of brews, you crafty bitch!


0 Comments

Art is cheaper than therapy...

1/31/2016

0 Comments


Art is cheaper than therapy, but with that said you will probably think I need therapy after this post!
 
Basic Interview questions at a Runway show:
Interviewer: “Can you describe your design process?”
Me: “I start with sketching, then I drape a muslin and make a pattern before making the sample piece that walked tonight.”
What I’m thinking: I freak out for a few weeks, procrastinate, drink heavily then panic some more before acutely doing anything.
Interviewer: “Where do you find inspiration?”
Me:” In everyday life… I love listening to music and just sketching.”
What I’m thinking: My box of wine and a sketch pad.
Interviewer: “When did you become a designer?”
Me: “I started cutting up my jeans and hand sewing them into skirts in Jr. High School.  I then proceeded to paint huge flowers, vines and checkers all over them… Add in my combat boots and butterfly clips in my hair, and it’s no wonder I was not popular in the 90’s.”
What I’m thinking: Are you f*cking for real right now?… Artists are born not made; what you should be asking is why I choose to express myself with cloth as my medium.
 
I wanted this post to reflect what it really looks like to start working on creating a clothing line. I feel like there is a common misconception (thank you reality TV!) that it’s easy to whip out a finished garment in one hour. This is a lie. Like all art, the design process takes time, and in my case wine.
 
The first step is to do some research. I’m a small designer, so I can’t afford to make things that no one will buy because they are not on trend for this season. So the first step is to do your homework!! I have included a few links to my favorite trend research spots below.
 
The next step is to get in your zone, whatever that is for you. For me it’s Miranda Lambert blaring in my studio and my sketch pad. Not to sound cheesy, but the mood of the music reflects in what I sketch. Next I pin up my sketches on a mood board (a.k.a. cork board that takes up a whole wall of my studio - I know I’m fancy like that) to see what will work on the runway. Sometimes I have great pieces that fit together, and sometimes I have to make adjustments and keep sketching.
 
Then it’s shopping time!! Try to buy in bulk if you are able to. It’s cheaper, and you have the option to put the piece into production after the runway. If you are not able to buy your fabric in bulk, you can just tell people “that was a runway exclusive, but I can make the same look for you in this other (less fabulous) fabric.”
 
Back on point… cut swatches of fabric and pin them to the mood board. This helps visualize the final line up. At this point I start the creating the garments one at a time. Drape, make a pattern, and make the final sample. Normally if I have a whole day I can finish one look, but if it’s a detailed piece it can take longer.
 
So that’s the process overall from start to runway! It’s not as glamorous as it looks on TV (or maybe I do look glamorous in yoga pants, my hair in a high-bun, no makeup on, and a glass of wine in one hand and fabric scissors in the other...then again maybe not…)
 
2016 trends and best tools to use to find them:
 
http://www.vogue.com/13361086/best-fashion-trends-spring-2016-runways/
 
http://www.pantone.com/pages/fcr/?season=Spring&year=2016&from=topNav
 
http://wwd.com/fashion-news/trends/
 
And don’t forget the almighty Pinterest!!!

0 Comments

Mexican Style Mac and Cheese served with Sangria

1/10/2016

2 Comments


For 2016 I have decided to go a new direction - I want to give you a close up look at my design process and my life. This is more of a warning than anything! So there you have it, you have been officially warned.  Welcome to the megMORGAN blog: the mad ravings of a HUNGRY (wine induced) Fashion Designer.  You might get to hear about design process insights… or just about what I crave when I’m designing, who knows!  I sure as hell don’t.
 
With that I would like to jump into my first post: How to drape fabric correctly to a bodice... Nope, not today... Fashion Sketching, not yet. No let’s start with something very close to this southern girl’s heart, and my love handles.
 
Mexican Style Mac and Cheese served with Sangria
 
Pre heat the Oven to 350 degrees
Butter a 9 x 13 in baking pan
 
Produce:
Cilantro 1/4 cup
Garlic 3 Cloves Chopped
3 Jalapeno thinly sliced for extra spice
1 Whole Onion thinly sliced
 
Condiments:
1 can (10 oz) of diced tomatoes with peppers
Olive Oil for drizzling
Tabasco 1 tsp (or 2 if you can take the heat!)
 
Meat:
Thick cut Bacon (Cook until almost crunchy and chop to bite size lil bits of heaven)
2 eggs Beaten
 
Pasta & Grains:
12 oz Macaroni (1 bag)
 
Baking & Spices:
Salt 2 tsp
All-Purpose Flour 1/4 cup
 
Dry Seasoning:
Chile Powder 4 tsp
Ground Paprika 2 tsp
Cumin   ½ tsp
 
Dairy:
Butter, Unsalted 4 tbs
Cotija Cheese 2 cups (1 to sprinkle before bacon and 1 with the cheese sauce)
Queso Fresco 5 oz
Monterey Jack Cheese 2 cups
Whole Milk 2 cups
Half and Half 1/2 cup (that’s a lot of halves!)
 
 
Step 1: Prep
 
Pour yourself a glass of sangria (go ahead! we all know food cooks better when the cook is happy)
 
Cook the noodles and set aside
 
Cook bacon and set aside
 
Beat 2 eggs in a small bowl and set aside
 
Using the bacon pan (wipe out the extra grease) sauté the onions, jalapeno, garlic, cilantro and plop in the can of diced tomatoes. Once done set aside. We will call this concoction our Veggie mix… or to keep with the Mexican theme… Our colorful Veggie Fiesta!
 
Step 2: Make the cheese sauce:
 
Melt 4 tbs of butter in a large pan on medium low heat and slowly mix in the flour.  (Wisk it… wisk it real good… cue the Salt-n-Pepa)
Now pour in the milk and wisk some more (it helps if you sing... Or just wisk until it’s thick and bubbly, your call).
 
Add salt and pepper (the spices this time) and a few dashes of tabasco
 
Take about 1/4 of the hot cream sauce and mix into the eggs (this will keep them from turning to scrambled when you add them to the pot heating on the stove)
 
Add the egg/hot cream sauce mix back to the big pan
 
And now you can get cheesy with it mmmmmmmmmm
Add all the Queso Fresco, Monterey Jack Cheese, and half the Cotija Cheese
 
 Mix in the noodles and its one cheese lil side dish; now all you need is the spice
 
Add the spices (side note, I don’t measure… Yes I’m one of those cooks. So make sure to taste test and add more if needed!)
Chile Powder
Ground Paprika
Cumin  
Tabasco
 
This is a good time to try your pasta, if you like the heat add more Tabasco. (This is when I have to tell myself NOT to make a big bowl and curl up on the couch… the finished product is worth it! Trust me, work through the temptation!)
 
 
Step 3: Get your layering on
 
Give your baking dish a good wipe down with good old olive oil just to make sure nothing sticks
 
Now let’s get layering!
 
Veggie Fiesta
Half the Macaroni
Bacon
Cotija cheese
 
Repeat all the layers ending with a layer of bacon and Cotija
 
Step 4: Get cookin’ sister
 
Bake the macaroni for 30 min or until it’s nice and bubbly on the sides
 
Step 5: nom nom nom
 
Let it cool for… oh who are we kidding dig in!
 
Plate and sprinkle cilantro to top for garnish
 
Now top off your sangria and enjoy!!
 

2 Comments
Forward>>

    RSS Feed

About us

Women's contemporary fashion,
Recipes and more

Follow us on social media

  • home
  • press
  • runway
  • contact
  • Let's talk food and fashion
  • Shop